As
the leaking of private photos stolen from several celebrities
proves, we all need to be more careful than ever to protect our data on
the Internet. You might think that this sort of thing only happens to
celebrities, and the rest of us need not worry, but think about all the
data that's there in just your email account. Social networks are our
public face, and email holds our financial data and more.
A
strong password is a good first step, but setting up two-factor
authentication adds another layer between other people and your data. If
you do this, then access to your account is restricted only to people
who have your password - and also access to the second level of
authentication, which can take the form of a text message, an email, or
even a paired app on your smartphone.
(Also see: How to Prevent
Theft of Photos From Your iCloud Account)
Some services offer all three modes of verification - others
rely on one or the other method. Regardless, once your authenticator is
set up, trying to log into your account results in a code being sent by
the chosen method, and without this code, the account won't be accessed.
Gmail
Your
Google account is probably the one you want to secure first. Not only
is your email account a repository of all sorts of important
information, but also, since our email ids are the default way to sign
into Web services today, your Gmail account can also serve as a gateway
to all your other accounts. To set up two-factor authentication, you
need to take the following steps:
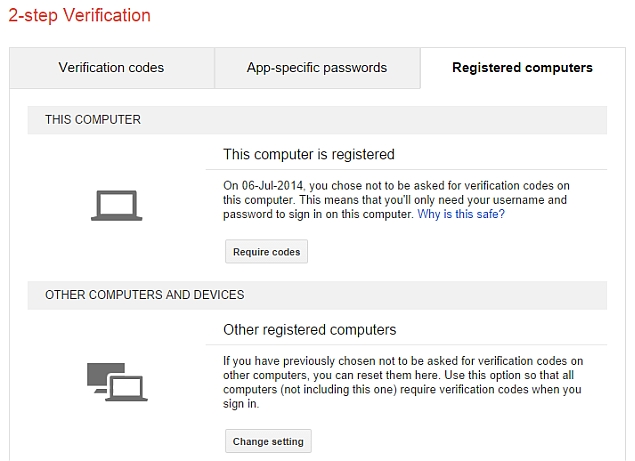
1. Go to Google Account Security and under Password, look for 2-step Verification.
2. Click setup. On the next page, click Start Set Up.
3. At the next page, sign in. In the box, enter your phone number.
4. Choose the mode by which you will receive the code > click Send code.
5.
A six-digit code will arrive on your phone via text message or by a
call. Enter the code on the website and click Verify > Next >
Confirm.
Next, Google will ask you to reconnect all your apps and
devices. If you've configured apps to access your Google account on any
device, you will have to create a separate app password for each and
sign in again. To do this, click Configure when Google prompts you to.
Now select the app (click Other if it isn't mentioned) and device from
drop-down menus and click Generate. Each code password you generate will
only work for one app.
Facebook
Facebook's two-step verification is not available in
all regions as of now. If it is available in your region, here's how to
set it up.
1. Open Facebook account security settings. If you see a header
called Login Approvals, under Login Notifications, then this is
available in your region. If not, then you'll have to wait till Facebook
rolls out this feature.
2. Click the Edit button next to Login
Approvals. Check "Require a security code to access my account from
other browsers". Click Save Changes. Click Get Started in the pop-up.
3.
Now you'll see a pop-up titled Alternate Security Code Delivery. Click
Continue, re-enter your password and hit Submit. Finally, you can key in
your phone number and click Continue. Now you will be sent a code via
text message. Enter this code on the website and hit Confirm.
4.
Facebook will now tell you that you can disable Login Approvals within a
week. In case you don't, you will need the security code sent via text
message every time you log in from a new browser. Facebook also lets you
a few login approval codes that you can use when you don't have your
phone. You may use these while you are travelling and your phone is out
of coverage area.
Apple
Apple's two-step verification is a bit of a long-winded process that will take a minimum of three days to set up. This is how.
1. Open your Apple ID page and sign in.
2. Click on Password and Security on the left side.
3. You will have to answer the two security questions you set up when you created your account.
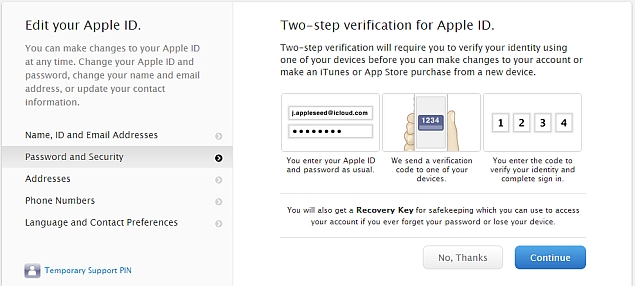
4. On the right-hand side, you will see Two-step verification at the top. Click Get Started.
5.
With two-step verification enabled, you will need any two of the
following to manage your Apple ID: Your password, a trusted device
(which can receive the code using Find My iPhone) and Your Recovery Key.
Every time you sign in to iTunes or make an iTunes purchase using a new
device, you will have to enter this information to sign in. Apple will
show you a warning for this and say that it will not be able to reset
your password should you need it. If you are fine with that, keep
clicking continue for two screens, and then click Get Started.
6.
As an added security precaution to set up two-step verification on your
Apple ID, the company asks you to wait three days to continue setting
this up. In the meantime, make sure that Find My iPhone/iPad is enabled
on your device. You can do this by going to Settings > iCloud >
Find My iPhone > On.
7. Sign in to your Apple ID again three
days later and open the security settings page to manage devices
registered to your account. Here you will be able to mark devices as
trusted, so you can sign in with just a password from them.
Twitter
There
are two ways to set up two-factor authentication for Twitter, but one
of them might not be an option for most people. If you want to use text
messages for authentication, your phone needs to be registered with
Twitter. Unfortunately, India is no longer in the list of countries where Twitter has any
SMS support. In case your phone has already been registered, all you
need to do is this:
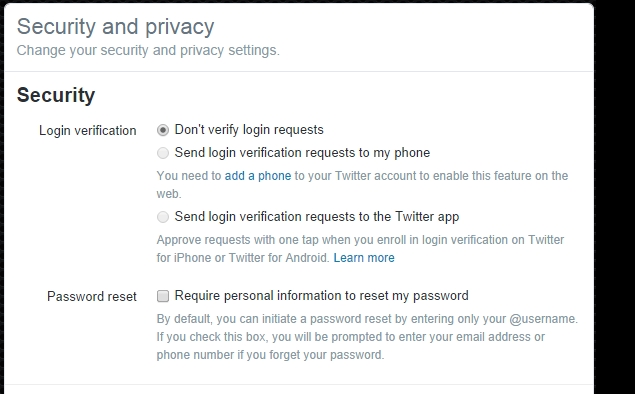
1. Go to Twitter account settings and select "Send login requests to my phone".
2. Scroll down to the bottom of the page and hit Save changes to enable this.
In
case you can't add your phone number, its still possible to use the
Twitter app on your smartphone as an authenticator. This is what you
need to do:
1. Start the Twitter app, and go to the settings page.
2. Tap on your account > scroll down, and tap on security.
3. Turn on Login Verification. You'll be shown a backup code, which lets you bypass this - save the code somewhere private.
4.
Once you do this, attempting to log into Twitter from any other device
will send a request to this app. To complete the login, you'll need to
come back to this page in the app > tap on Login Requests > Tap on
the check mark to allow the login.
Outlook
Microsoft makes it very easy to set up two-factor authentication. Here's how.
1. Sign in to your Microsoft account and click Security & Password on the left.
2.
When you sign up, Outlook asks you to provide an alternative email
address or phone number. Before you can modify account information,
Outlook will ask you to enter your alternative email address or the
phone number. Do that and click Next. You'll get a code on your email
address or phone. Enter the code and click Next.
4. Now click Set
up two-step verification > Next. Now you can choose whether you want
to use your email address, phone or an app to receive the second code.
We suggest you pick a phone because you are most likely to have it with
you at all times. Enter your phone number to finish the process. You
will receive a four-digit code on your phone. Enter it and hit OK to
enable two-step verification for your account.

Yahoo
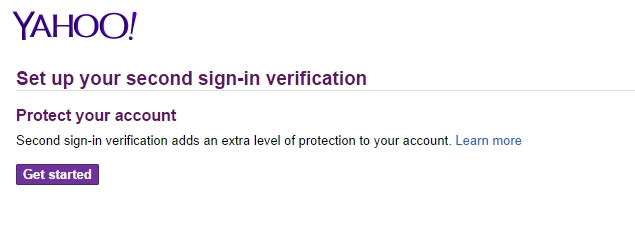
Try these steps to set up an added security layer for your Yahoo account.
1.
Visit this Yahoo page to set up
two-factor authentication. Click Get started.
2. If you hadn't
already set up your phone number with Yahoo, click Add New Phone >
enter your phone number > click Send code.
3. Enter the code in the box > click OK.
4.
This will set up second sign-in verification on your phone. You can
choose between using only your phone for verification or allowing the
security questions that you filled in when you created the account.
This
should have helped you set up two-step verification on your accounts.
For more tutorials, visit our
How to section.
Affiliate links may be automatically generated - see our ethics statement for details. 
 Apple Dealt Stinging Court Defeat on App Store Sales Commissions1 May 2025
![[Sponsored] Consumers React! New Galaxy Book5 Series in India](https://c.ndtvimg.com/2025-04/frnf0064_samsung_160x120_29_April_25.jpg?downsize=180:*)


![Gadgets 360 With Technical Guruji: News of the Week [April 26, 2024]](https://c.ndtvimg.com/2025-04/5ucuv89c_news-of-the-week_160x120_26_April_25.jpg?downsize=180:*)


