Few handsets have seen the kind of speculation that preceded the launch
of Nokia's first Android smartphone. But a lot of people were let down
to learn that the phone runs a highly customised version of Android,
making way for Microsoft's services such as Bing search, OneDrive
(earlier called SkyDrive),
Outlook.com and Skype among others, instead
of the Google Play store and
Google services.
(Also see: Nokia X Dual SIM review)
The
Nokia X is based on the Android Open Source Project (AOSP), and is
powered by Microsoft and Nokia services. Nokia has used the AOSP version
corresponding to Android 4.1 Jelly Bean as the baseline for its
operating system. The highlight of the Nokia X is the highly customised
version of Android, with Metro-inspired UI and access to Nokia's own app
store. While there's no access to Google's Play Store, Nokia is
offering side-loading of Android apps from any third-party source:
1mobile market, SlideME market, Aptoide, and Yandex Store.
However,
it is possible to install the Google Play store on the Nokia X through
rooting. This means giving the user root permission on the phone. By
rooting a device you can run apps that require access to certain system
settings, and the ability to flash custom ROMs to the phone, which can
actually add extra features. Before starting, note that unlocking the
bootloader or rooting process voids the warranty of your device. And
more importantly, the rooting process might brick the device if you make
any mistakes, so be careful when following these steps.
(Also
see: How to install WhatsApp and other apps on Nokia X from 'unofficial'
sources)
Method 1-
Rooting the Nokia X:
In order to run Google apps, you will be required to root your Nokia X with the following steps-
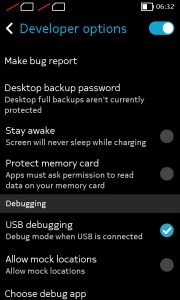
-Users
will be required to enable USB debugging on the Nokia X that can be
found in Settings' Developer option. You will have to tick the USB
debugging box to successfully perform the rooting process.
To
start, you will have to enable USB debugging. To do this, first go to
your phone's Settings > Developer and tick the USB debugging box.
-Next
users have to download the Farmaroot.apk to the Nokia X or to a Windows PC (transfer it to the Nokia X). Use
the automatic setup to install the root tool on the Nokia X phone.
To
start, go to the Farmaroot.apk folder in your Nokia X > Click the
.APK file and it will start the automatic installation of the app on to
the phone, follow the instructions.
(If a file is transferred from
PC to the Nokia X, users can search for the required file on the phone
via the ASTRO File Manager, which comes pre-installed on the device.)
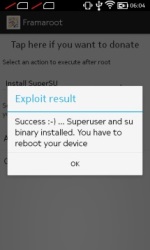
Once, the Farmaroot has installed on your Nokia X, choose the app icon in app drawer to install SuperSU. To install, open the SuperSU file and choose the Gandalf exploit, which is a dropdown option in the Farmaroot app.
When
the installation is complete, there will be a success pop-up message on
the screen. Now you just need to reboot your Nokia X for successful
completion of the rooting process.
- The Farmaroot app on the Nokia X also gives an option to unroot the device, if you want to bring it back to normal.
Installing the Google Play store on the Nokia X:
-Download
the Google services APKs from here on your Nokia X or a Windows PC and copy the APKs to the phone using a
USB cable.
To start, go to this link
install the Google services APKs to your phone or Windows PC.
Transfer all the Google APKs to Nokia X using a USB cable.
-Now,
you will be required to extract all the Google APKs. To do this, first
download a root explorer app on your Nokia X, which is a file manager for root users.
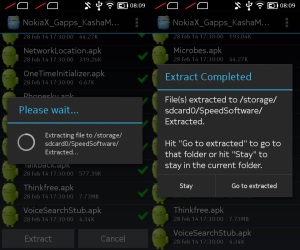
Go to the
folder where you saved the Google APKs and select all the files; next
from the menu choose the option Extract all. The extracted APK files
will be automatically stored on to microSD card's SpeedSoftware folder.
At this stage, do not install the APKs.
-The extracted files then
must be moved on to /system/apps folder of the Nokia X. (Use the root
explorer app, and go to the SpeedSoftware folder on the microSD card.
Select the files, and from the menu, choose Cut. Then, go to the
/system/apps/ folder, and choose Paste from the menu.)
-Next, you
will have to change the permission of all the extracted files in the
/system/apps folder by selecting all the files that were extracted
(Google APKs) and opening the Permission option in the menu for the all
the apps. The Owner, Group and Other options should have Read Only
checked in the popup that comes when you press Permission. Only Owner
should have the Write option checked. Reboot your Nokia X once the
permission has been changed for all the extracted Google APK files to
make the device more stable.
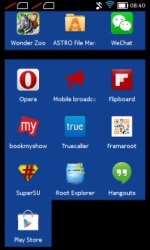
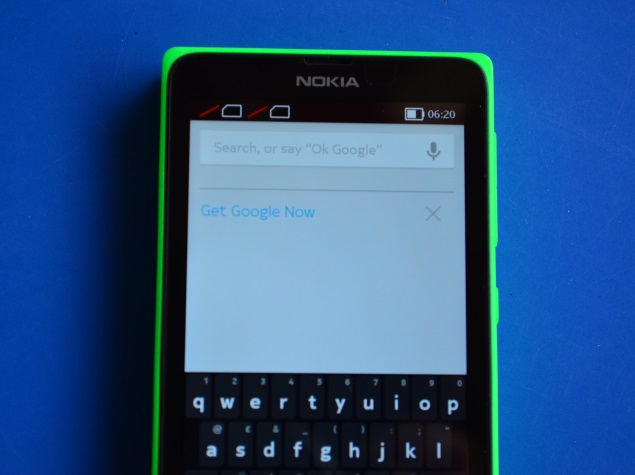
-Now you will find the Google
app icons for Hangouts, Gmail, and Google Play Store among others in
the app drawer.
Enjoy, you have successfully installed the Google Play
store and other Google services on your Nokia X. Now sign-in to your
Google account to access Google services on your Nokia X and you can
explore your favourite Android apps directly from the Play Store.
This
method works with the earlier version of the Nokia X software, but once
you move to version 11.1.1, new security features don't permit this
technique. There's a new method that can help if you've updated your
phone though.
Method 2-
In case the above method does not work because of new security restrictions, here's what you can do:
-Install
the Nokia composite ADB interface on your Windows PC, in addition to installing the Framaroot.apk
on your Nokia X (following the steps detailed above).
The Nokia
composite ADB interface folder installed on your PC should have two sub
folders for KingoRoot_NokiaX_Mod and Nokia X USB drivers.
-Plug
your Nokia X to the Windows PC with a USB cable, open the device manager
and right click on the connected device. This gives the Update Driver
option on your Windows PC, to install the ADB drivers.
You might
be prompted to enter new drivers for your Nokia X, which can be found
the Nokia composite ADB interface folder - Nokia X USB drivers. Just
choose browse, go to the folder and select the driver.
-Now you
need to open the KingoRoot.exe file on your Windows PC, which can be
found in the Nokia composite ADB interface folder. Please note that you
need to keep your Nokia X connected to the Windows PC during the
complete process.
-Once you have started the KingoRoot app on the
PC, it will appear on your Windows PC screen giving you an option to
root the connected device. When the phone is not rooted, KingoRoot on
the PC shows the status of the connected device as Not Rooted.
-Now
users need to choose the Root button in the KingoRoot app on your PC to
root the device. This will also install the SuperSU app on the
connected Nokia X device automatically. This will take few minutes.
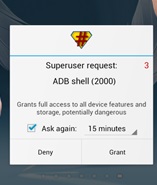
-Reboot the phone after the connected device (Nokia X) status in KingoRoot app shows Rooted on your PC. After
the reboot, open the SuperSU app on the Nokia X, this will for the ask
grant option on the app. Press grant and move ahead.
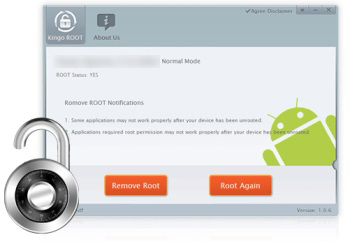
-After
pressing grant, open KingoRoot on your PC again. This time the
KingoRoot shows two options - Root again or Remove Root. To return your
phone to normal, you can click on Remove Root.
-Now you can repeat
the method of installing the Google Play store on the Nokia X (check
Method 1) by extracting all the Google APKs using the root explorer.
*Note-
Our recommendation would be to install Google Play Store and other
services on your Nokia X when it is running version 10.0.3, rather than
updating the phone to software version 11.1.1. This is because the new
method requires the KingoRoot app on your PC and the steps are a bit
complicated when compared to the Framaroot app that worked well enough
for us on our Nokia X.


 Google Photos Has a Hidden Shortcut That Switches from Ask Photos to Classic Search28 April 2025
![[Sponsored] Consumers React! New Galaxy Book5 Series in India](https://c.ndtvimg.com/2025-04/frnf0064_samsung_160x120_29_April_25.jpg?downsize=180:*)


![Gadgets 360 With Technical Guruji: News of the Week [April 26, 2024]](https://c.ndtvimg.com/2025-04/5ucuv89c_news-of-the-week_160x120_26_April_25.jpg?downsize=180:*)


