- Home
- Laptops
- Laptops Features
- How to Take Screenshot in Windows 10: 4 Simple Ways to Take a Screenshot in Windows 10
How to Take Screenshot in Windows 10: 4 Simple Ways to Take a Screenshot in Windows 10

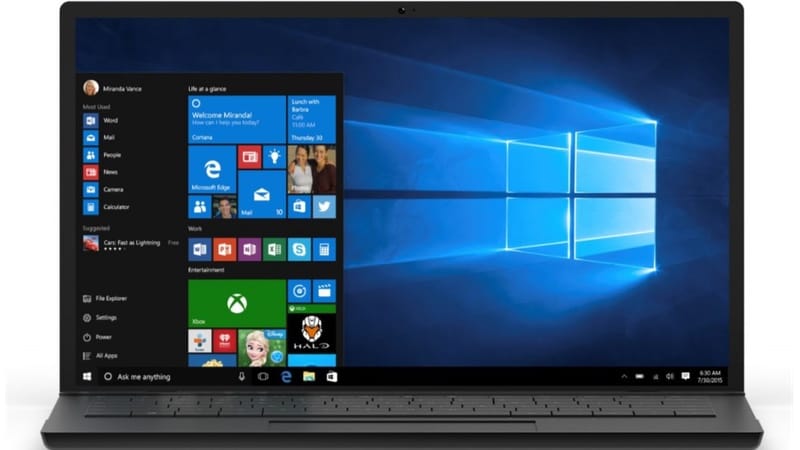
Windows 10 is Microsoft’s latest operating system largely for desktops and laptops. Taking a screenshot is one of the most essential features on any platform and Windows is no different. You can easily take screenshots on Windows 10 via some simple shortcuts. These allow you to take a screenshot and save it to a folder. You can take a screenshot of the entire screen or just one window on screen. You may even save the screenshot to the clipboard and paste it in any app such as Microsoft Paint. Once you follow this guide, you’ll learn a few new key combinations to take screenshots in Windows 10.
Taking screenshots is quite simple on practically every platform. On macOS, for example, you can press cmd + shift + 3 to take a screenshot of the entire screen and cmd + shift + 4 lets you select a portion of the screen for screenshots. This guide will help you accomplish the same on Windows.
How to take a screenshot of the entire screen in Windows 10
Here are two ways to take a full screen screenshot in Windows 10:
- Press Windows key + Print Screen.
- Now go to the Pictures library on your computer by launching Explorer (Windows key + e) and in the left pane click Pictures.
- Open the Screenshots folder here to find your screenshot saved here with the name Screenshot (NUMBER).
You can also just press Print Screen and open MS Paint. Now press ctrl + v to paste the screenshot in Paint. You can now save it anywhere you like.
![]()
How to take a screenshot of the current window only
If you just want to take a screenshot of an app or window you’ve opened, follow these steps:
- Click on the app you want to take a screenshot. Make sure it’s in the foreground and not behind other open apps.
- Press alt + Print Screen.
- Open MS Paint.
- Press ctrl + v.
- This will paste the screenshot of the open window in Paint. You can save the screenshot anywhere you like.
How to take a screenshot of a part of the screen in Windows 10
This is where you use the Windows Snipping Tool. Follow these steps to take a screenshot of part of the screen in Windows 10:
- Open Snipping Tool. It’s under Start menu > All programs > Accessories. You can also open Start menu and simply use the search box to find it.
- Now click the down arrow next to New.
- Select Rectangular Snip or Free-form Snip. The former lets you capture a rectangular screenshot and the latter lets you draw any shape on screen and takes a screenshot of that part.
- Once you’ve done that, you can use the Snipping tool to annotate the screenshot if needed and save it to your PC.
How to take a screenshot via the Game Bar in Windows 10
If you want another way to take screenshots, follow these steps.
- On your Windows 10 PC, press Windows key + G.
- Click the Camera button to take a screenshot. Once you open the game bar, you can also do this via Windows + Alt + Print Screen. You’ll see a notification that describes where the screenshot is saved.
That’s how to take screenshots on Windows. These are simple methods but we were surprised to know that many Gadgets 360 staff members didn’t know about all of them, so hopefully these helped you as well. For more tutorials, you can visit our How To section.
Get your daily dose of tech news, reviews, and insights, in under 80 characters on Gadgets 360 Turbo. Connect with fellow tech lovers on our Forum. Follow us on X, Facebook, WhatsApp, Threads and Google News for instant updates. Catch all the action on our YouTube channel.
Related Stories
- Samsung Galaxy Unpacked 2025
- ChatGPT
- Redmi Note 14 Pro+
- iPhone 16
- Apple Vision Pro
- Oneplus 12
- OnePlus Nord CE 3 Lite 5G
- iPhone 13
- Xiaomi 14 Pro
- Oppo Find N3
- Tecno Spark Go (2023)
- Realme V30
- Best Phones Under 25000
- Samsung Galaxy S24 Series
- Cryptocurrency
- iQoo 12
- Samsung Galaxy S24 Ultra
- Giottus
- Samsung Galaxy Z Flip 5
- Apple 'Scary Fast'
- Housefull 5
- GoPro Hero 12 Black Review
- Invincible Season 2
- JioGlass
- HD Ready TV
- Laptop Under 50000
- Smartwatch Under 10000
- Latest Mobile Phones
- Compare Phones
- OPPO A6v 5G
- OPPO A6i+ 5G
- Realme 16 5G
- Redmi Turbo 5
- Redmi Turbo 5 Max
- Moto G77
- Moto G67
- Realme P4 Power 5G
- HP HyperX Omen 15
- Acer Chromebook 311 (2026)
- Lenovo Idea Tab Plus
- Realme Pad 3
- HMD Watch P1
- HMD Watch X1
- Haier H5E Series
- Acerpure Nitro Z Series 100-inch QLED TV
- Asus ROG Ally
- Nintendo Switch Lite
- Haier 1.6 Ton 5 Star Inverter Split AC (HSU19G-MZAID5BN-INV)
- Haier 1.6 Ton 5 Star Inverter Split AC (HSU19G-MZAIM5BN-INV)


